Thursday, October 29, 2009

Mission Accomplished: Table Numbers

Now that the invitations are nearly complete, I must occupy my time with another project... ...table numbers!

As you may have noticed, this design was also used for our card box. It was adapted from Martha Stewart's table number template. Sure, the border is the same, but the font is different (I used the same Edwardian Script ITC font I used for the Save the Dates, invites, and card box...so far...). Also, Martha's table numbers only went up to 20, and we will have at least 23 tables.

I am excited to see these table numbers in action! I finally plotted out the reception layout, coordinating the colors of the table numbers, menu cards, table runners, and candle/flower centerpieces. Yikes!

Ciao,

Friday, October 23, 2009

Mission Accomplished: Pocketfold Invitations

Invitation making is in full swing now, and I'm already about halfway through!
I have about three weeks to finish the rest of the invitations, but I hardly think that will be a problem now that I've got my system down! :) Here's a little rundown on my invitation assembly line...

1. Take an 8.5" x 11" sheet of cardstock (I'd recommend at least 100 lb. cover cardstock for optimal strength) and measure 4" from one side and 2" from the other.

2. Fold the cardstock along the lines you've marked off. (I used this laminated math formula cheat sheet to help me fold in a straight line!)

3. Trim 1.5" from the top of the piece of cardstock. This will create a 5" x 7" invitation when folded (11" x 7" when fully open), which will fit perfectly in an A7 envelope (more on those later).

4. Don't just throw this little strip away though! Trim another 0.5" off of it (so it's 1" thick), and set it aside to use as a belly band for the orange invitations.

5. Next, take another 8.5" x 11" sheet of cardstock and cut out two 5" x 4.75" pieces. These will be used to make the pocket of the pocketfold invitations. I saved the rest of the cardstock to use for the placecards I will be making later on.

6. The next step is to make the flaps of the pocket so it can be attached to the invitation. So, measure 0.5" from all sides except the top.

7. Then, fold the flaps over where marked. Again, I used my handy-dandy math formula cheat sheet to fold them.

8. To make the corners of the pocket, it's necessary to snip of the excess cardstock. So, fold the corners and snip away!

9. Then, to attach the pocket to the invitation, I used glue dots on the corners and a glue stick on the edges.

Here's what the pocketfold invitation looks like without any of the text or inserts added yet. Pretty fabulous, eh?

10. Next I glue-stuck the invitation and reception cards to the invitation.

11. Then I inserted the direction and response cards into the pocket.

12. For our out-of-town guests, I added a "Travel Information" card. I actually like the look of the invitation with the third card in the pocket, but I figured it was unnecessary for the local guests.

13. Next up were the belly bands! Remember the strip cut off from the top of the invitations? Well, here they are in action! After affixing the monogram with a glue dot, the belly bands were slipped into place.

14. The invitations were then placed in an envelope of the opposite color. Then, envelope wraps were glue-stuck (new favorite verb!) on.

Here's a view of the back of the envelope. That's our return address on the back. :)

15. This is my favorite step - adding the completed invitation to the "done" box! :) I'm trying to keep them separated - the stacks on the left are those with the "travel information" insert and the stacks on the right are those without. I'm not sure if there will be a difference in postage, but it'll be so much easier if there is!

Ciao,

Wednesday, October 21, 2009

Engagement Photos - Part I

Well, our engagement photo shoot was a success! Tons of fun, gorgeous scenery, and lots of smiles and laughs! We actually had two photo shoots - one with our photographer and one with my fiance's sister. You see, I really wanted to take some pictures in a downtown setting, but our photographer didn't have enough time to accommodate three locations. So we just asked Steve's sister to help out, and this is what we got...

Overall, I'm happy with our downtown shoot! I love the industrial + downtown chic vibe we got from the fab scenery, which included a rickety, death-defying, abandoned set of railroad tracks. Spectacles, testicles, wallet, and watch! Thank God we made it out alive! :)

Ciao,

Wednesday, October 14, 2009

Cake Remix

As you may recall, I had fallen in love with this oversized damask wedding cake...
However, I was a bit hesitant because I didn't want to set myself up for a Cake Wreck! You know, I would show my baker this amazing picture and expect a cake equally exquisite, only to be disappointed on our wedding day to see a topsy-turvy sort of square blobby damask cake. Not that I don't have complete faith in our baker, but you get the picture! Besides, I didn't really like the idea of completely copying another baker's work, even if I did switch up the colors ever so slightly...
But nevermind that because I have thought of a much better idea! Since I'm obviously so in love with my damask stamp, why not incorporate its image into the cake like this...
Okay, it's a little crude, but you get the idea! Pink-tinted frosting, damask images at alternating corners (on the other sides as well), and three white fondant flowers on the top, which I grabbed from an image on our baker's website.

I'm so excited about this design breakthrough! It's much more original than the first design, and I'm much less worried about a possible cake wreck. I think this design is right our baker's alley!

Ciao,

Thursday, October 8, 2009

Target Faves

Now that the online portion of our Target registry works, I can showcase some of the fabulous items on that registry!

Michaels Graves Design Automatic Drip Coffeemaker
Steve couldn't make up his mind about the coffeemaker, so I stepped in and picked one out for him! It's cute, programmable, and uses paper filters (Steve's odd prerequisite).

French Silicone Rolling Pin
I've been wanting a french rolling pin for some time, and this one even comes in pink! Doesn't get much better than this!

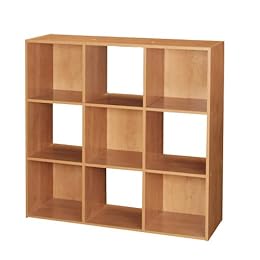
Closetmaid 9 Cube Organizer
This would make the perfect bookcase for our office! We need a little extra room to store all of our office supplies, books, and, well, just random stuff!

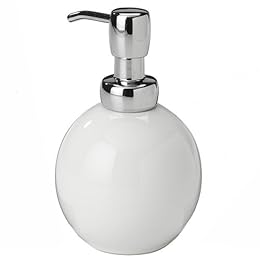
Cero Spa Soap Pump
I saw this and just had to add it to our registry! It comes with a matching toothbrush holder, which we of course scanned as well.

Ciao,